Thursday 22 December 2016

Intermain's ARCHICAD Template File Introduction

Your Template File for ARCHICAD 20

The new template file for ARCHICAD 20 has been customized for improving the efficiency of the most common Documentation, and Modeling tasks.
To this date, the original the template file has been located at "K:\CAD\STANDARDS\SUPPORT FILES V20\" but it should be available form your starting dialog window in ARCHICAD.

You will also have access to a sample file located at "K:\TUTORIALS\" , this is a sample file with a sample model, views and layouts for you to use as an example.


Please find below a series of links that will help you get familiarized with the template file and how to use it.

Starting a Project

Finding the template file and choosing a Work Environment

Documentation

Please take look at the how the Publisher Sets, Layout Book and View Map have been set up here.

Modeling and Drafting

Take a look at the Project Map, Favourites and some of the attributes.

Modifying and upgrading your Template File

Let's say you want to inlcude something new to the file... or to prepare ti fot the next version of ARCHICAD and it's new features.

ARCHICAD Libraries for the New Template File

Here a quick look at how your new and customized INTERMAIN Library was set up and what you should or shouldn't do with it.


Starting a Project

To ensure you're using the new template, makes sure you choose the following file at the Start Screen:

That's it!!


---------------------------------------------------------------------------------

Hold On!

What if you can't see the Template file in that list?
Don't worry, just please follow this steps:
  1. Click on the drop down menu of the available template files
  2. Click on Browse

and then
  1. Search for the file at : "K:\CAD\Templates\Version 20\"
  2. look for "INTERMAIN V20.tpl"
  3. Click on "Select"


**NOTE: The Template file only affects new projects not existing ones.

---------------------------------------------------------

It is also a good idea to make sure that ARCHICAD is always looking and connected to the right Template file. To do this please make sure your Work Environment is looking for the Template in the right folder:


---------------------------------------------------------


Once that's done, and you have started your project file, please make sure you fill up the basic Project Information.
Do this in the very beginning and you don't have to worry about it later!


Documentation

In your INTERMAIN Template you will find the following pre-set content for Documentation:

Publisher Sets

The Publisher sets have been divided in 3 groups:
Export, Printing and Others
Please refer to "the Publisher in detail" post for more information


Layout Book

Your Layout Book has been organized to help you creating the relevant to documentation as efficient and accurately as possible.
Both a set of folders or Subsets and different Master Layouts have been set for different purposes and stages. Find out more here.


View Map

There are 5 Folders in the View map.
  • the very first one: ****Sample Drawing Styles**** is just a sample one, and it can be use as a guide only (on Graphics styles and View types)
  • For Documentation: That's the one you want to use for your project and keep the views clean and tidily organized
  • Personal Views: ... so that you can create your own mess or test views if necessary. try not to use that for actual Documentation.
  • Batch Rendering: Automated folder connected to the Publisher set to Automate the batch production of renders
  • ---Title Blocks & master Layout Content ---: this is not for Project work but to keep all drafting aids and relevant Layout information and graphics


The Publisher Sets in detail

Publisher Sets will help you automate the processes of: Printing, Exporting as PDF - all drawings in one file, Exporting as PDF - each drawing in a separate file, other cool things like:Batch Rendering ( multiple renders in a queue), Exporting BIMx files

All of this with pre-set content, naming conventions, and predefined configurations... all with a couple of clicks.

The INTERMAIN Template comes with publisher set for:
  • Exporting PDFs
  • Exporting DWGs
  • Priniting
  • Saving Renders
  • Saving BIMx files
Let's take a closer look:

00 - EXPORT - LAYOUTS - PDF - (All Layouts in One PDF)

This will export a Single PDF file with the selected content as pages:
Make sure you verify the Name of the File and the Path every time you Publish this set - you may want to change the name at every revision.


... and then select the actual content of the PDF file


--------------------------------------------

00 - EXPORT -  LAYOUTS - PDF - (Each Layout in Separate PDFs)


This, on the other side will export multiple PDF files, each named after the page / layout items ( which you DO NOT have to change at any time.
Please change the File Path the first time and review it at every subsequent publishing jobs:

Same as before, select the desired pages and publish them.


--------------------------------

01 - EXPORT - LAYOUTS - DWG  // 01 - EXPORT VIEWS - DWG


These two will export the selected Layouts or selected Views in DWG format for AutoCAD users.
For both please review the Path as you did with the PDF files.


Note that the source is linked for both but, one is coming form the Layout Book while the other is coming from the View Map.

The DWG files are exported using a standard Translator ( from ARCHICAD to AutoCAD) and it should give you consistent dwg content.
In case you need to change the translation set up, please modify the translation rules under: the menu: File / Interoperabilty / DXF - DWG / DXF - DWG Translation Setup


--------------------------------

01 - PRINT LAYOUTS - A3 TO FIT // 01 - PRINT LAYOUTS - FULL SIZE


Both of these Sets have been preset for the current INTERMAIN printers in Sydney and will shrink and fit anything to A3 in the case of the first one and will print to full size (if anything bigger or smaller) to the right size.
No need to change anything in them.

--------------------------------

02 -  BATCH RENDERING - JPEG

This Set will automate the task of rendering multiple views and save them on a specific folder with a  specific naming convention.
Review the following settings:
The content of the publisher set comes as a link form the folder with the same name in the View Map and these views will be rendered as per the view settings ( see next two images)


--------------------------------------

02 EXPORT - 3D - BIMx + Docs

This Set will help you keep the BIMx files consistent in content.
First make sure you set up the file name and path...

This Set is Empty by default, so please make sure you populate it with a Model view ( at least  one but more are possible) and drawings from the Layout Book:


All you have to do then is select the publisher set and it will include the Model and Drawings into the BIMx file.

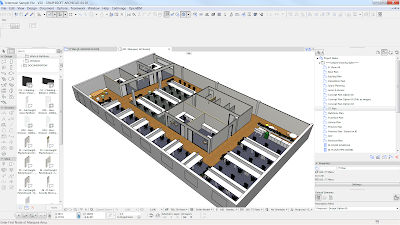
If you want to open that into your iPhone or iPad, please follow this link.


The Layout Book in detail


Your INTERMAIN Template comes with a few Pre-populated Layouts divided into SubSets, let's take a look:


TRANSMITTAL LETTER

To produce a Transmittal Document, please follow this:

If you need to change the information contained in the actual transmittal, please open and modify the Project Index called "** GENERAL ISSUE HISTORY" in the Project Map

NOTE: if you are looking for a more "official" version of the Transmittal, please take a look at this article online.

THE CONCEPT SUBSET


This Set is for Concept Drawings in A3 format (see also A3 CONCEPT Master Layout)
and it will help you create Concept Booklets quickly.


There's only a few Auto Texts linked to these masters. Most of the content will be placed here using the Drawing tool with the "Concept Drawing" Favourite:


For this Set use the following Masters:
  • A3 - COVER
  • A3 - CONCEPT

THE CONSTRUCTION SUBSET
(AND ACTUALLY ALL THE REST DOWN TO AS BUILTS)

This Set is for Construction Drawings in A1 or A2 format (see also A1- General & A2-General Master Layouts).

See how the title block for the construction Master Layouts works:


When using these Construction Masters, please use the Drawing Tool with the "Legends" and " Plans - Type 01"favourites:


And use the Legend worksheets views provided - and expand and improve them.


MASTER LAYOUTS

Find here a quick description of all available pre built Masters:


The View Map in detail

There are two sides of the View Map:
  • The Folder Structure and the dedicated use
  • The View Settings for different Viewpoints and Graphic Styles

----------------------------------------------------

THE FOLDER STRUCTURE

Each Folder has a purpose and dedicated use. Some you should customize for your project and some you should not (because they make the template work). Let's check one by one.

****Sample Drawing Styles****

The first Folder contains sample views. You can use them as a quick start, just Copy / Drag those Views into another folder for your use in documentation.
e.i.


FOR DOCUMENTATION

This is the one you should customize for your Projects Needs. Notice that all folders match the Layout Book organization, If you change one, make sure you change the other to keep things consistent.
Probably the most important thing here is to keep this folder neatly organized at all times, to make sure you are in control of the documentation


PERSONAL VIEWS / SKETCHES

Good news if you are the messy kind, this is the folder for you: her you can create as many views for you to make tests, or simply temporary sketches, plans, 3D views etc...
We recommend creating on folder with your name, and everyone will know that's your stuff.
IMPORTANT: do not use views in this folder for Contractual Documentation (that goes in to the previous folder)


BATCH RENDERING

This folder is connected with the Batch Rendering Publisher Set. It is really up to you if you want to delete it, it doesn't hurt keeping it there.

To use it, Save there 3D Views set to be generated in the PhotoRendering Window


---Tittle Blocks & Master Layout Content---

This folder is where you keep Layout Book related content that would be standard and reused in multiple Drawings.
That's why there are Legends and title blocks. Feel free to include Scale bars, Symbols and other common content.


----------------------------------------------------

THE VIEW SETTINGS


In the sample views you will be able to review the different view settings assigned to different view styles.
View Filters have been organized in a way that the Drawing /Graphic Styles will be aligned by names for :

  • Layer Combination
  • Model View Option 
  • Graphic Override 
  • Renovation filter
While the other view filters are given in the template, will control settings but not directly related to Graphic Styles:
  • Scale
  • Pen Set
And finally Structure Display - which you really don't change very often.


Modeling and Drafting

To create content both in the model and your viewpoints, you will find pre built in the project map of your template the following Viewpoints:

  • Stories
  • Worksheets
  • Schedules 

For actual creation we have standardize some of the most common Building elements and Drafting tools in the Favourites Palette:


The Project Map in detail

The Project Map has a pre set structure and some pre loaded content distributed across the following Viewpoints: Stories, Worksheets and Schedules (including Project indexes)

Story Settings

The stories has been set up with a Ground Floor (0) and an Upper Floor (1), and you should rename them to fit your project.

You will find an additional level below: (-1) **Modules, This one works for the purpose of creating modules for repetitive elements that you can re use in the actual project levels (see modules). This level is not set as a story and by default all floor to floor heights are set to 3000mm - please change it to fit your Project needs


----------------------------------------------------

Worksheets

Four worksheets have been created:
  • AS1428.1-2009 Standards: This contains all the graphics to check minimum door and toilet spaces 
  • GRAPHIC SCALE - 1:100: This  is only a graphical scale you can add to drawings
  • Legends, Abbreviations & Notes: contains all the Legends of the Project, 
  • TITLEBLOCK - GENERAL: single location for the standard title block of your drawings


----------------------------------------------------

Schedules

Schedules starting with a star (*) are meant for Quality Checks:

  • All ID numbers
  • Furniture ID numbers
  • Glazing -CW- ID numbers
  • Walls ID numbers
  • Doors

There's also Schedules than can be used as a starting point for:
  • Chair Types
  • Door Schedules
  • Ceiling Types
  • Floor types
  • Wall Legends
Under Project Indexes, you will find:

  • General Changes List - in case you're using that feature of the Revision tool
  • General Issue History - Which generates the Transmittal
  • View Settings - Standards - which will let you check the View Filters - so drawings come up consistent in graphics
  • All Drawings - A simple drawing list of all layouts you have created as an index
  • Concept Drawings - The drawing index for the Concept Subset in the Layout Book


Favourites in detail

Favourites will help you with the creation of standard elements in both Modeling and Documentation.
The favourites folders in your Template have been organized in 3 groups:

All loaded favourites can be modified r copied to fit Project requirements. The recommended process is to make a copy and place it in the **PROJECT SPECIFIC** folder, and rename it / edit it there.

Favourites are the main tool for you to keep elements with consistent standards